3‐WeekLookAheadSchedule‐Excel2007Version
Page1
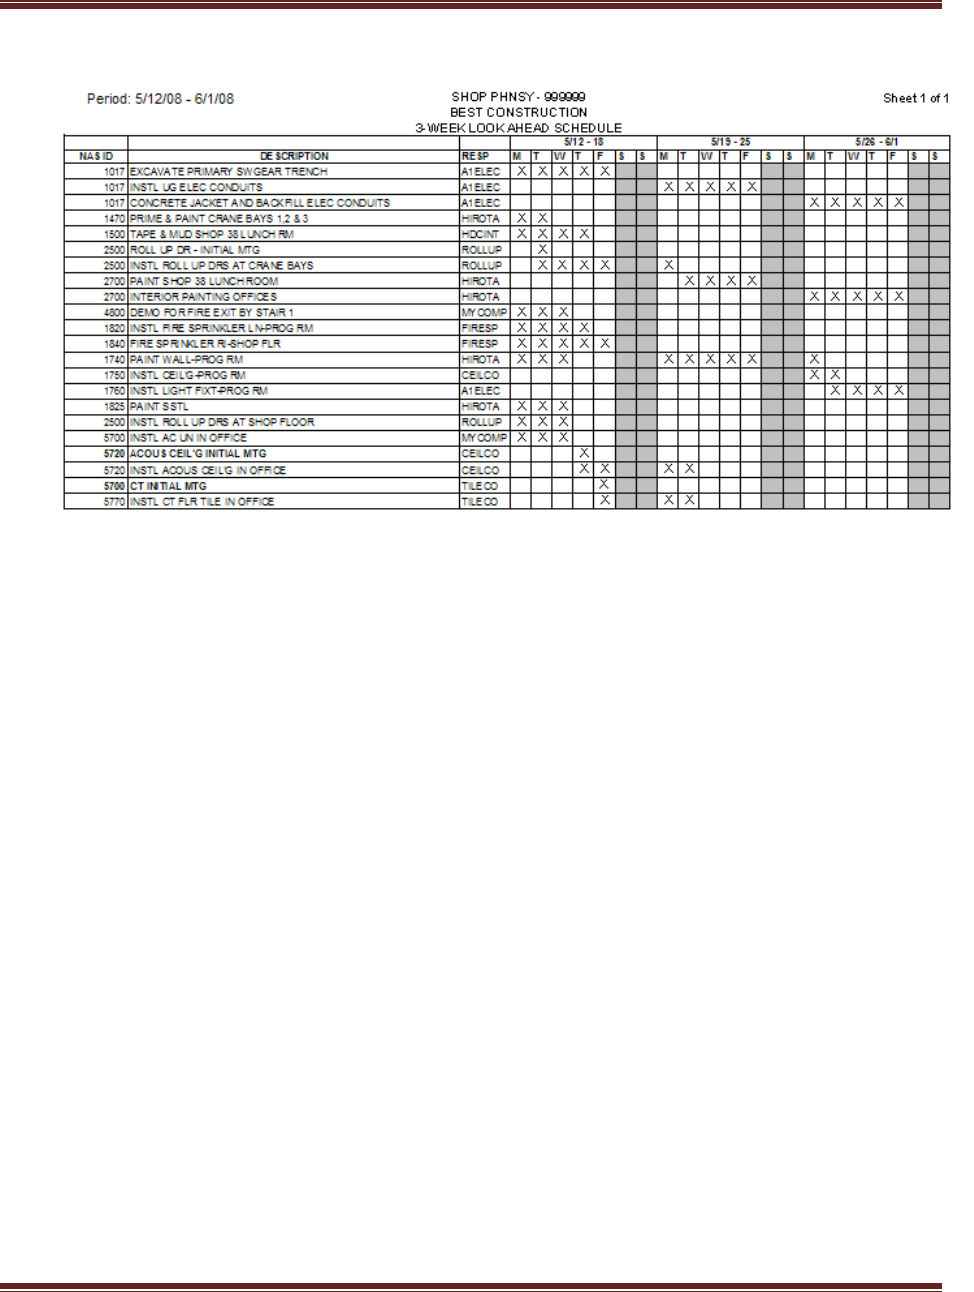
Standard Format
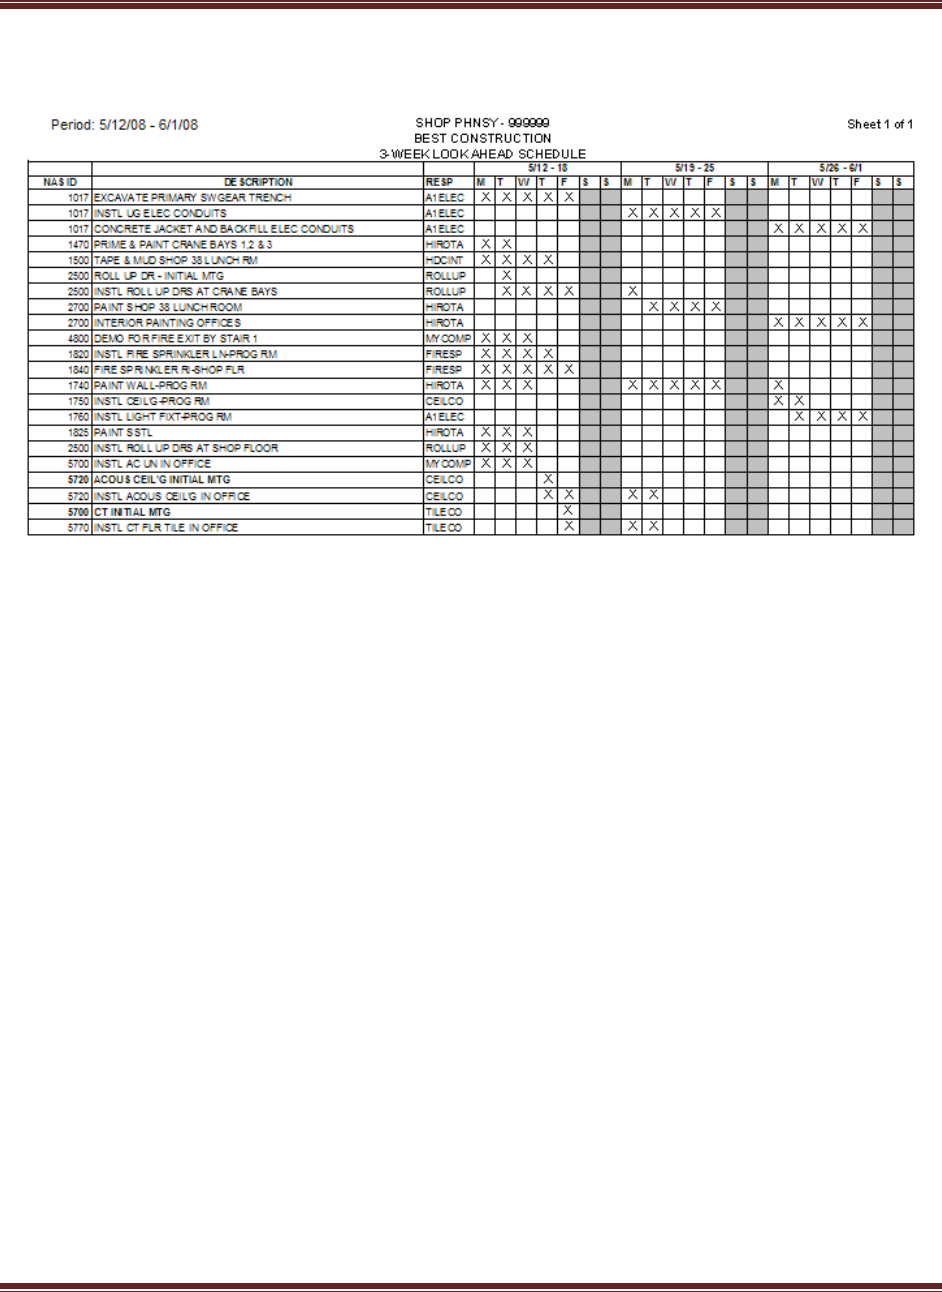
Detailed day-to-day schedule of the tasks identified in the overall project schedule
Planned work for the current and next 2 weeks
Prepared by the contractor
Bar Chart updated and submitted weekly
Reviewed weekly
Durations < 5 working days
Identify outages, closures and control activities
ET day planner and time management tool
Required for all construction contracts
3‐WeekLookAheadSchedule‐Excel2007Version
Page2
Creating a New Schedule
Add Report Header Information
1. Open project 3WLA Excel Template.xls
2. Save Project as 3WL Week 1.xls
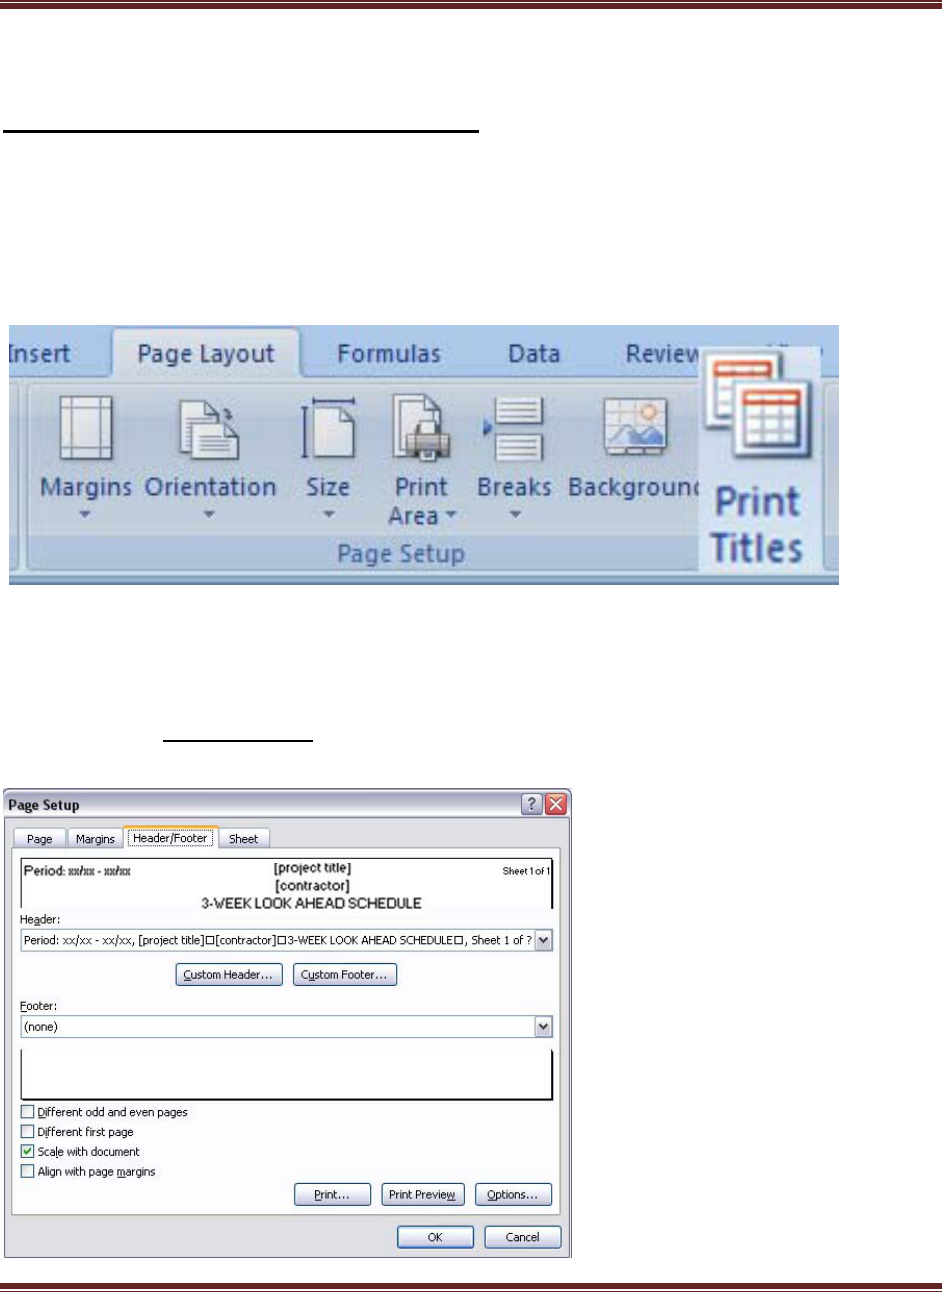
3. Click on Print Titles icon located in Page Layout, Page Setup
4. Click on Header/Footer tab
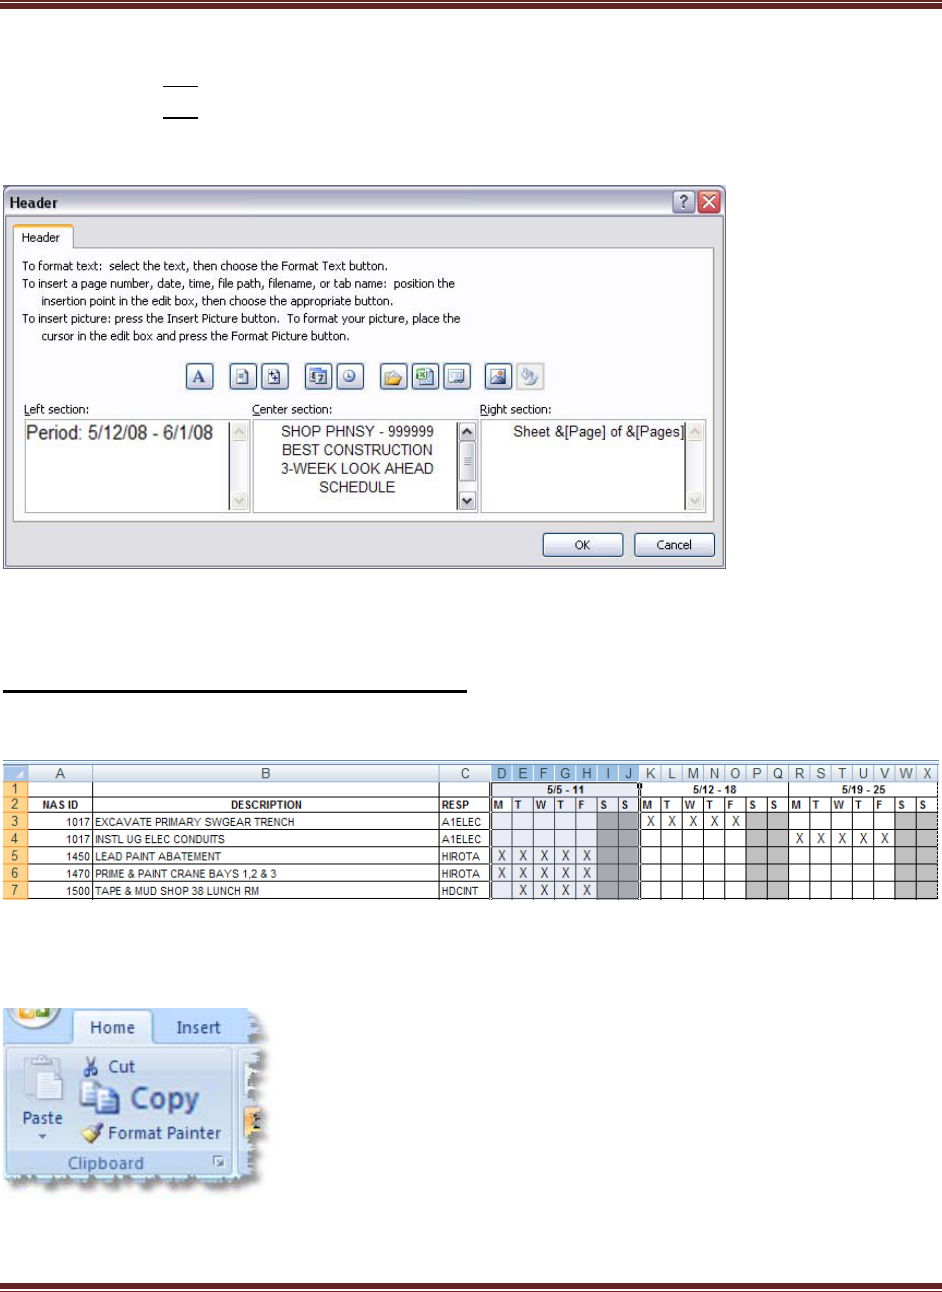
5. Click on Custom Header button
3‐WeekLookAheadSchedule‐Excel2007Version
Page3
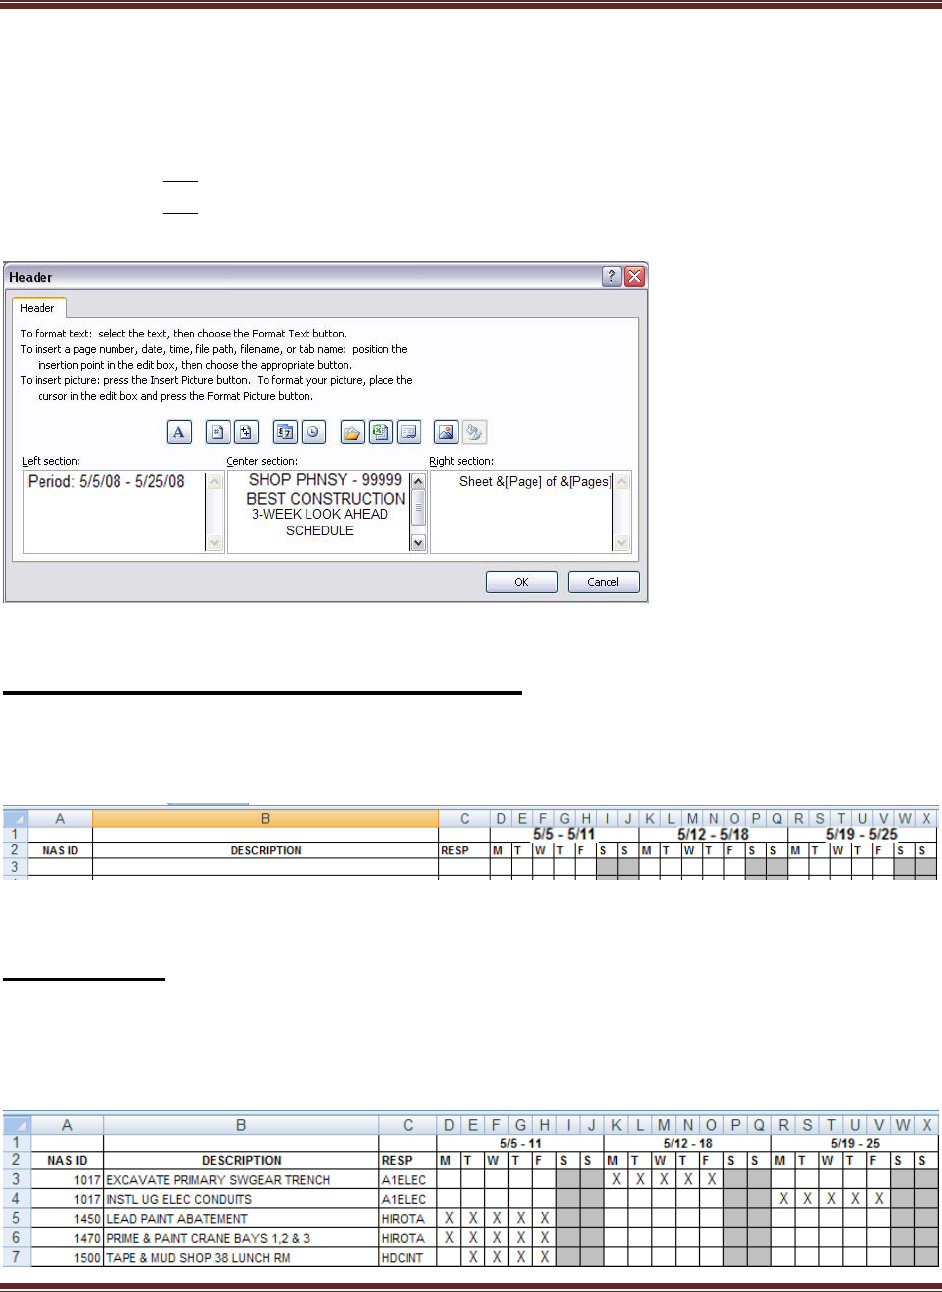
6. Change Period to “5/5/08 – 5/25/08”
7. Enter Project Title “SHOP PHNSY – 99999”
8. Enter Contractor “BEST CONSTRUCTION”
9. Click on OK button
10. Click on OK
button
Work Week Start and Finish Dates
1. Enter week start and finish dates “5/5 – 5/11”, “5/12 – 5/18” and “5/19 – 5/25” in the
timescale section of the schedule
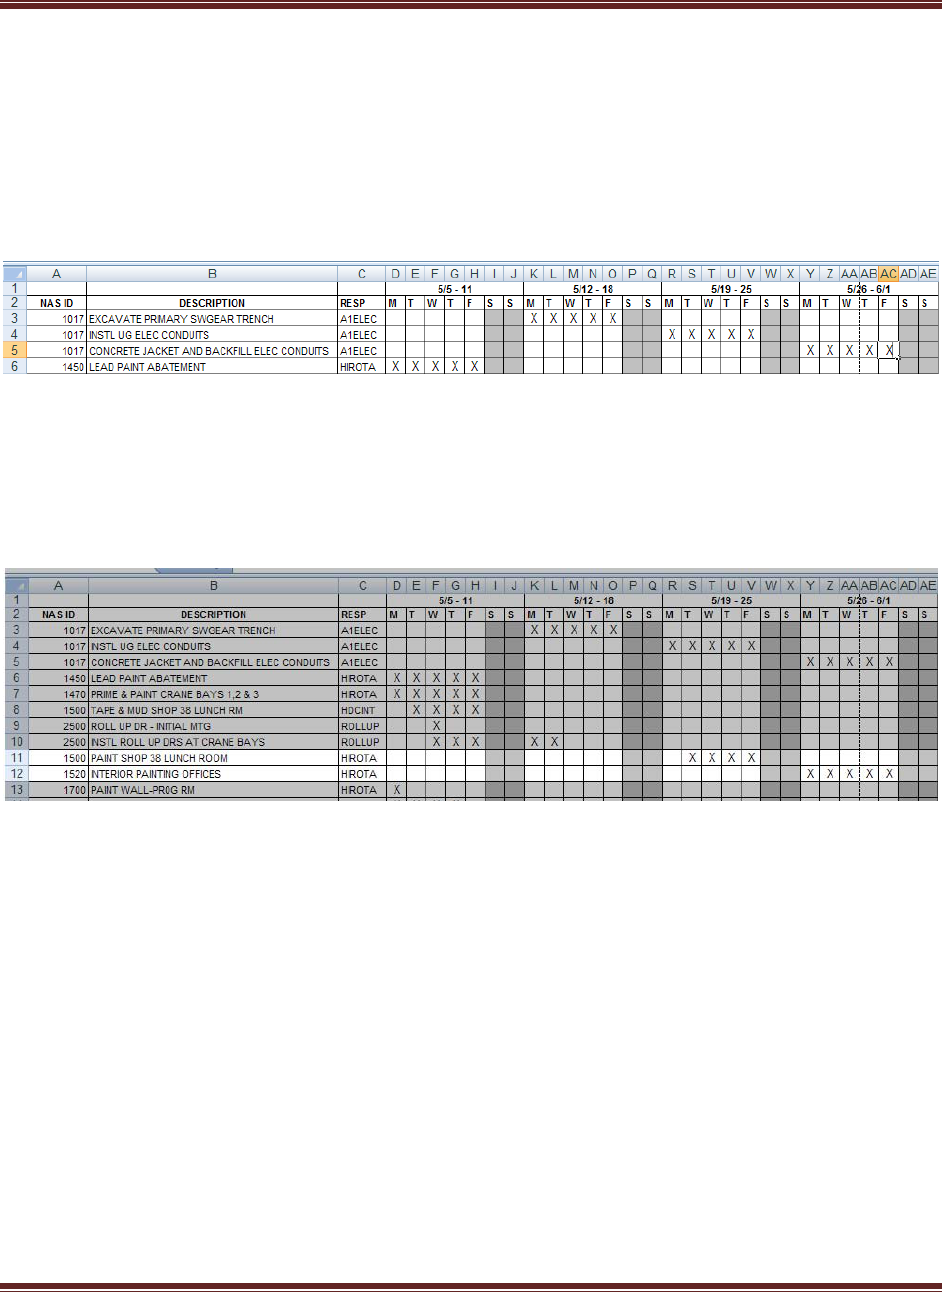
Add Tasks
1. NAS ID is the Task ID number for the associated task on the Project Schedule
2. RESP is the company responsible for completing the task
3‐WeekLookAheadSchedule‐Excel2007Version
Page4
Updating the Schedule
Revise Report Header Information
1. Open project 3WLA Lesson 2.xls
2. Save Project as 3WLA Week 2.xls
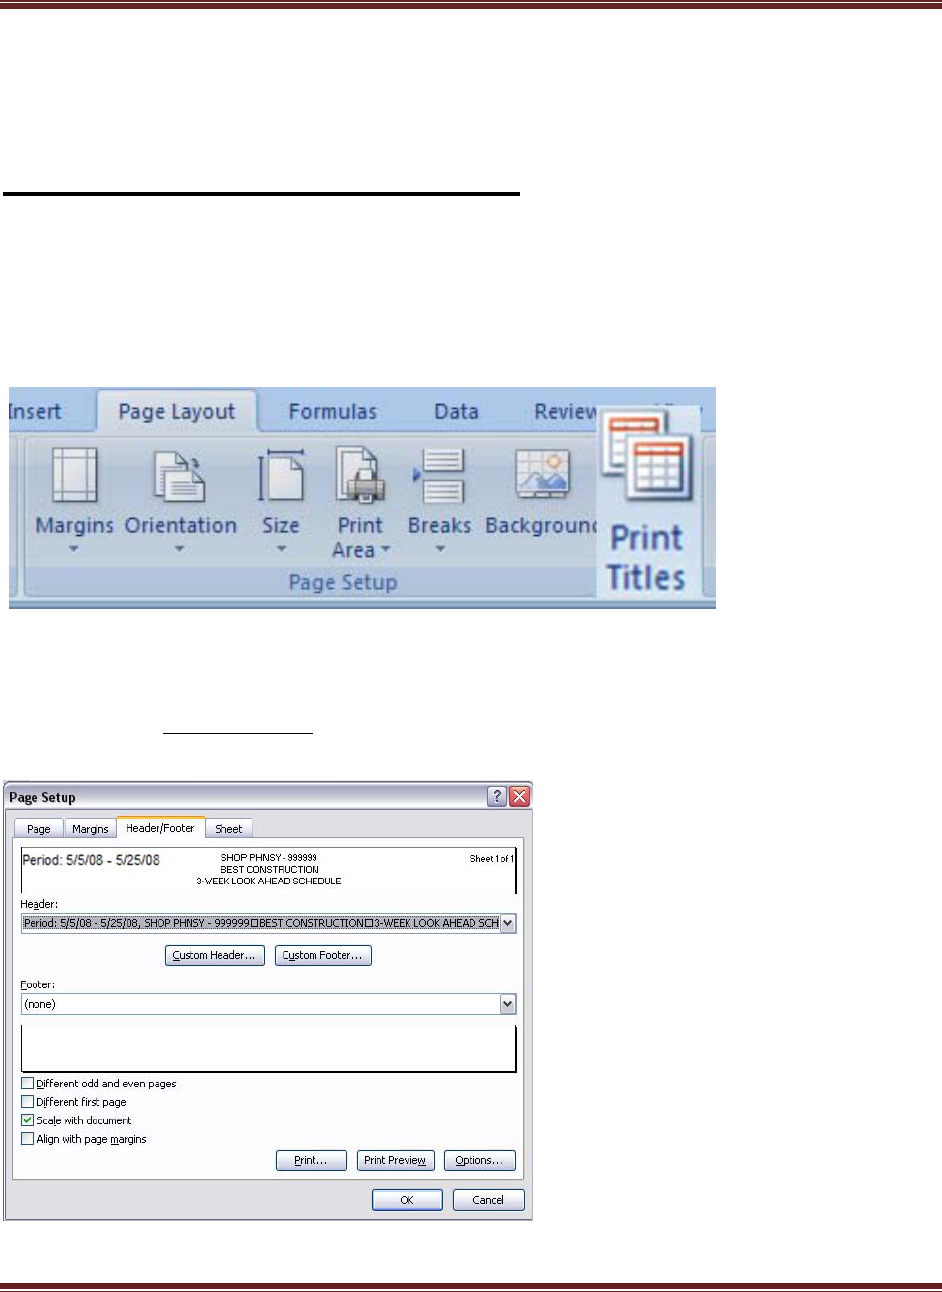
3. Click on Print Titles icon located in Page Layout, Page Setup
4. Click on Header/Footer tab
5. Click on Custom Header button
3‐WeekLookAheadSchedule‐Excel2007Version
Page5
6. Change Period to “5/12/08 – 6/1/08”
7. Click on OK button
8. Click on OK button
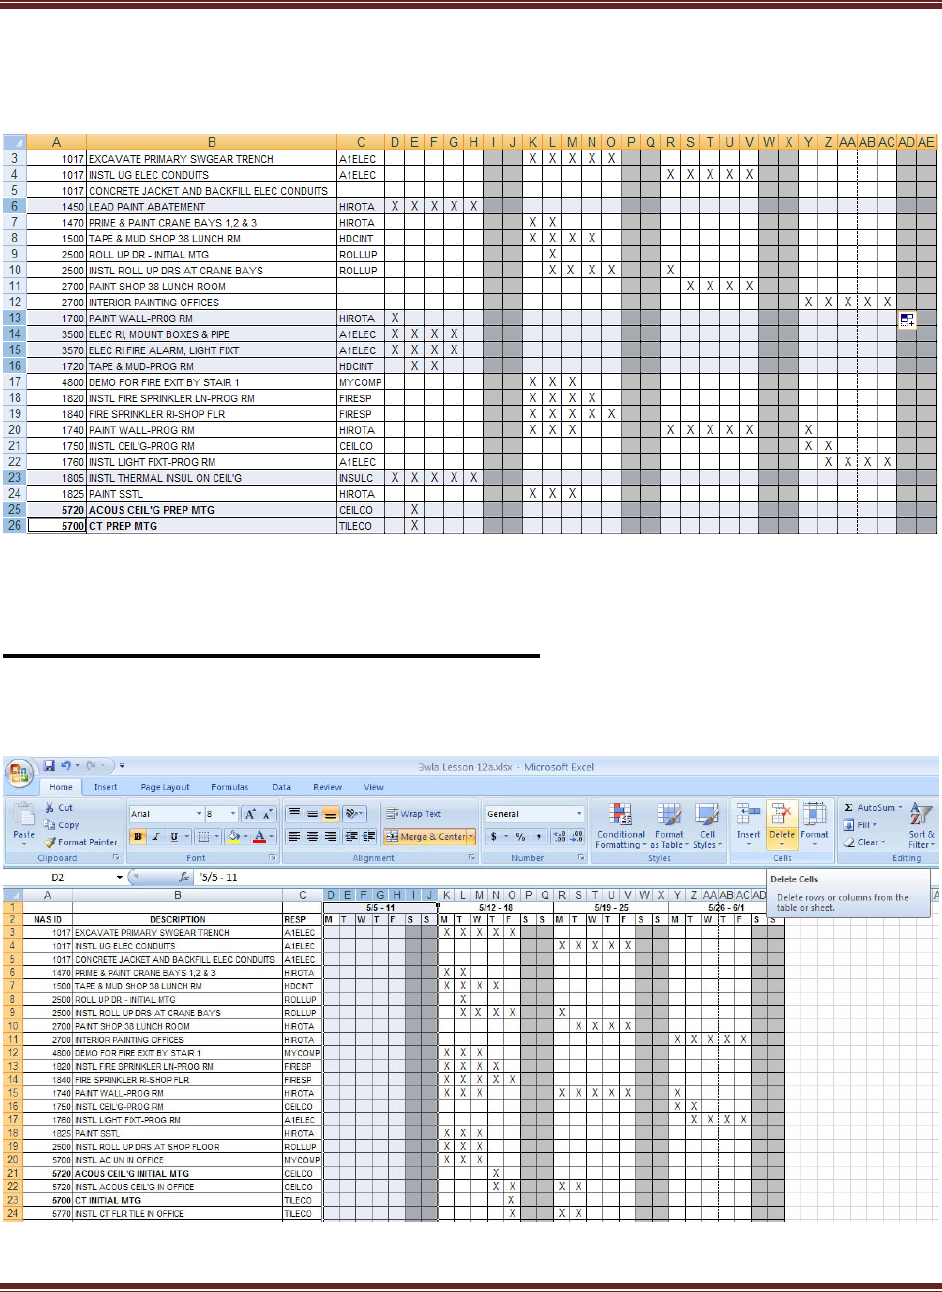
Add new week to the schedule
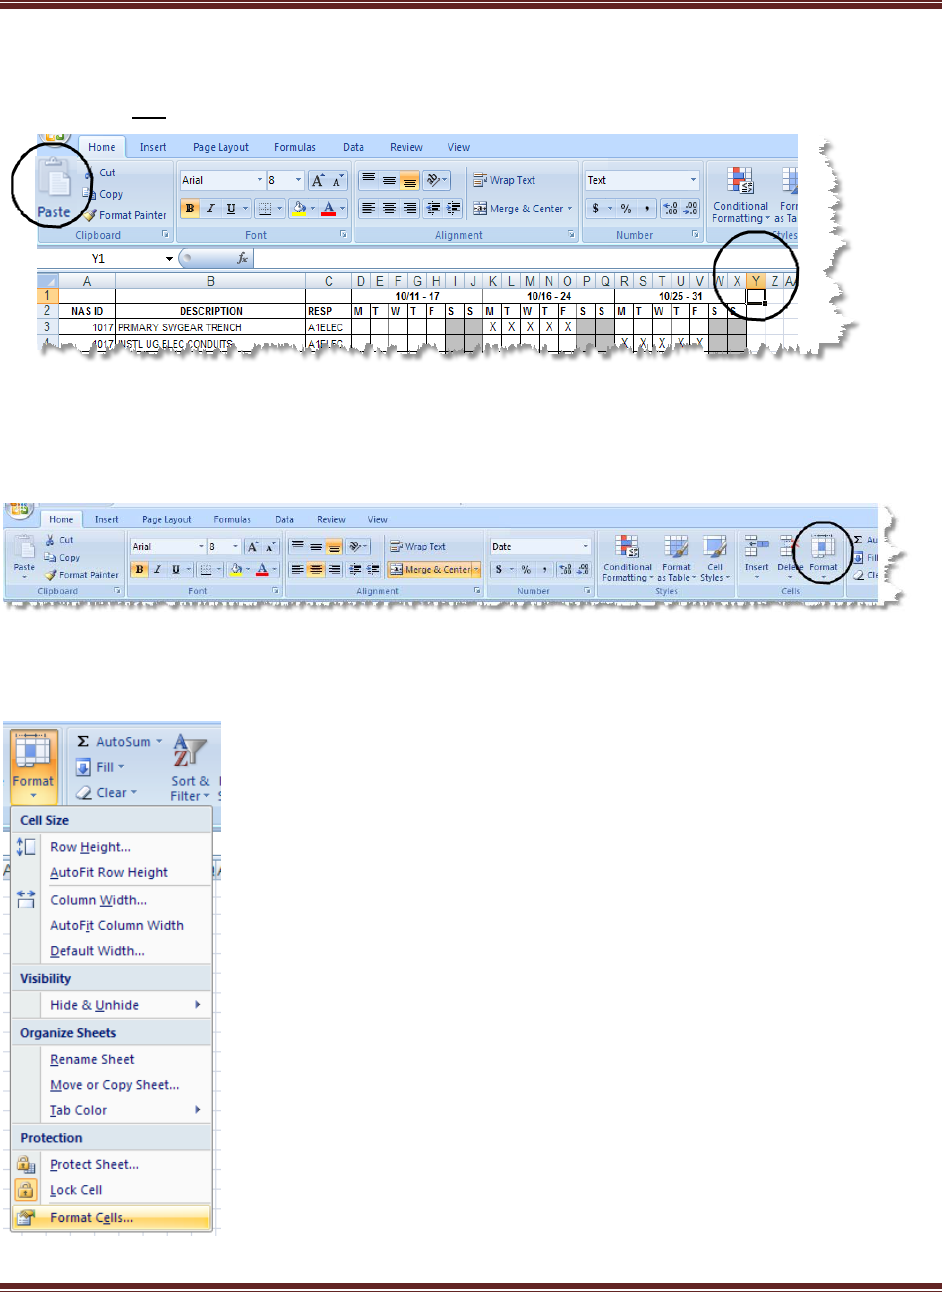
1. Highlight columns D through J
2. Click on Copy icon located in Home, Clipboard
3‐WeekLookAheadSchedule‐Excel2007Version
Page6
3. Click in cell Y1
4. Click on Paste icon located in Home, Clipboard
5. Press Esc key to deselect columns D through J
6. Click in cell Y1
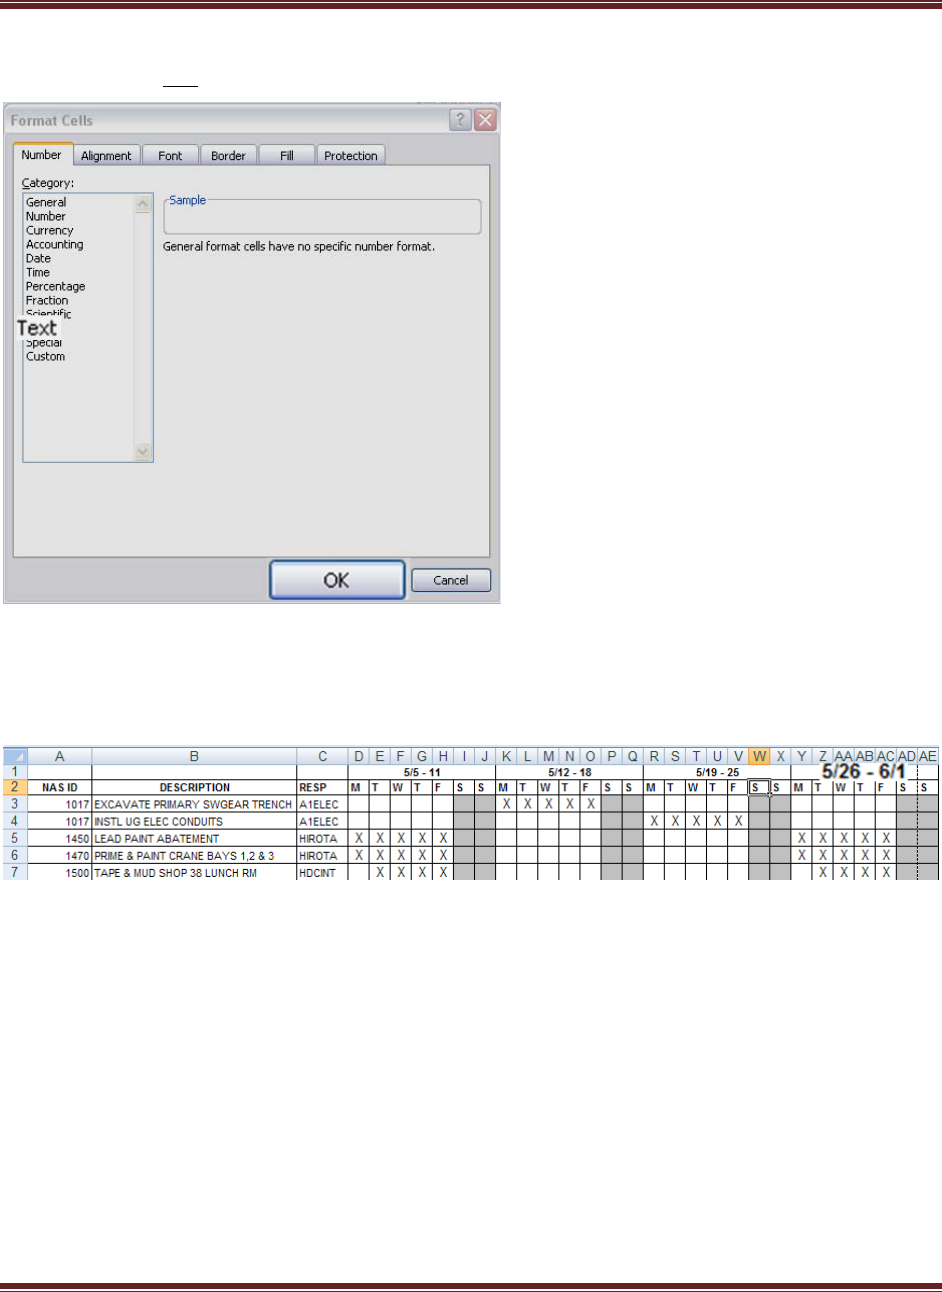
7. Click on Format icon located in Home, Cells
8. Select Format Cells from list of options
3‐WeekLookAheadSchedule‐Excel2007Version
Page7
9. Select Text from options list
10. Click on OK button
11. Click in cell Y1
12. Enter new work week “5/26 – 6/1”
3‐WeekLookAheadSchedule‐Excel2007Version
Page8
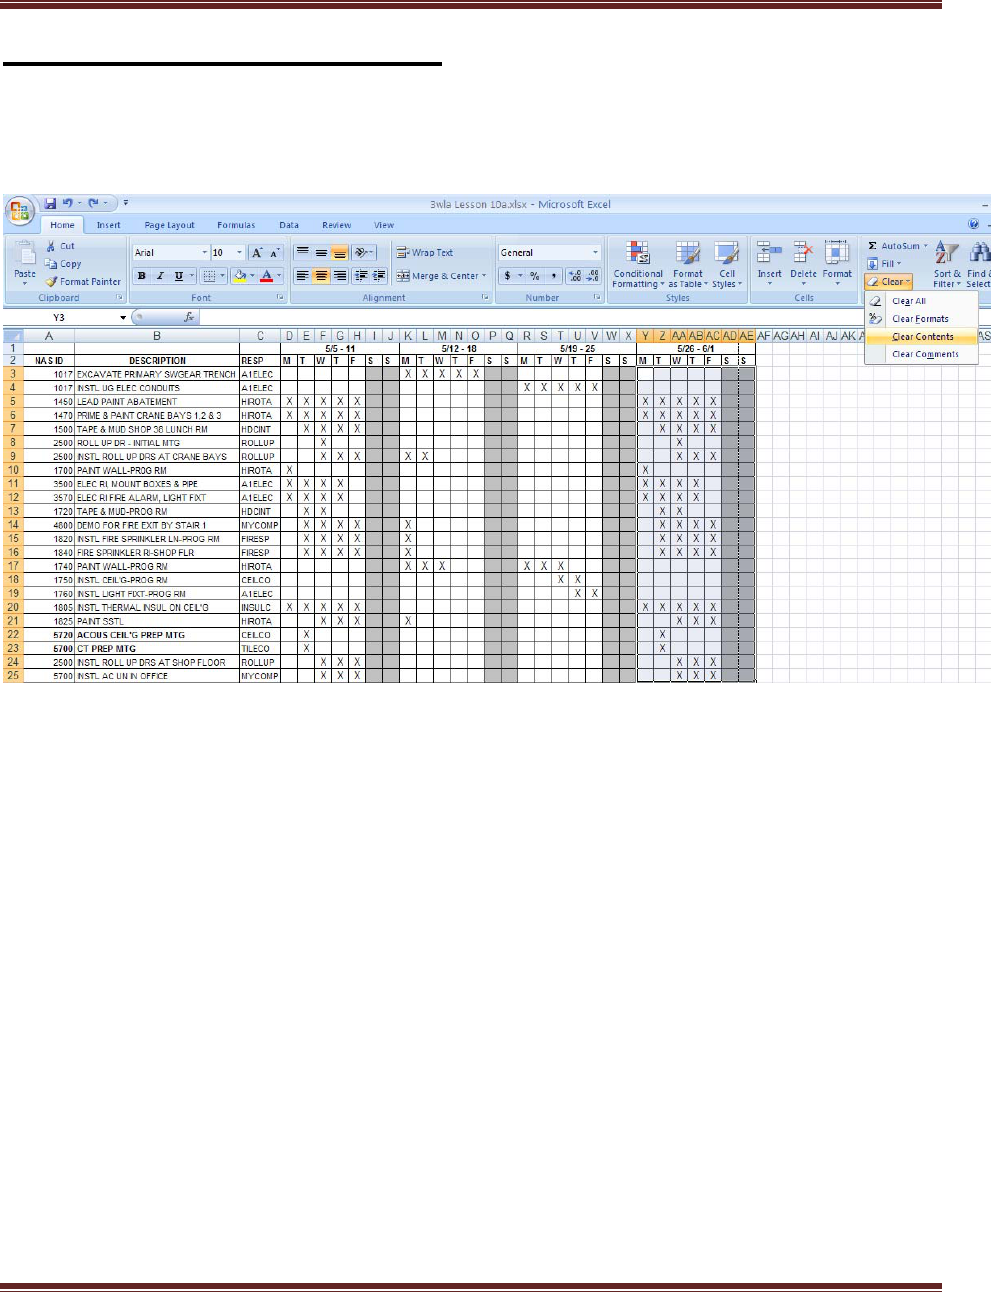
Clear Contents Of New Week
1. Select cell range Y3:AC25
2. Clear contents

3‐WeekLookAheadSchedule‐Excel2007Version
Page9
Update the schedule
1. Revise Task start and finish points for the new 3-week period
2. Insert new activities
a. Select Row 5
b. Click on Insert button located in Home, Cell
3‐WeekLookAheadSchedule‐Excel2007Version
Page10
c. Click in cell A5 and enter “1017”
d. Enter new activity description “CONCRETE JACKET AND BACKFILL
ELEC CONDUITS”
e. Click in cell C5 and enter “A1ELEC”, company responsible for completing
activity
f. Identify planned work days by entering “X” in cells Y5 thru S5
3. Insert tasks “PAINT SHOP 38 LUNCH ROOM” and “INTERIOR PAINTING
OFFICES”
a. Assign NAS ID and Resp as shown below
3‐WeekLookAheadSchedule‐Excel2007Version
Page11
4. Delete completed activity
a. Select Row 6, 13, 14, 15, 16, 23, 25 and 26
b. Click on Delete icon located in Home, Cells
Delete first week from the schedule
1. Select columns D through J
2. Click on Delete icon located in Home, Cells
3‐WeekLookAheadSchedule‐Excel2007Version
Page12
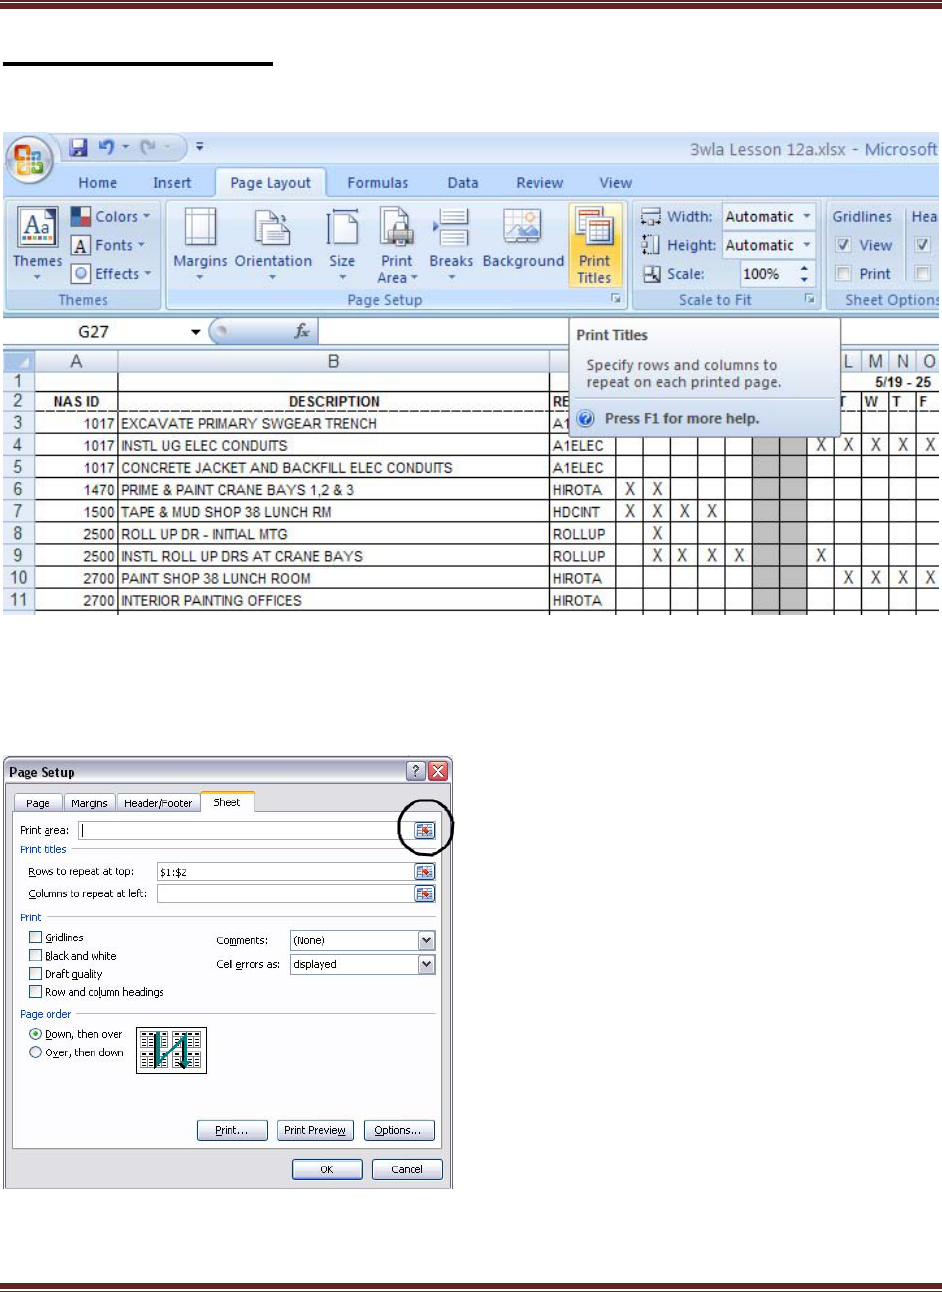
Select print range
1. Click on Print Titles icon located in Page Layout, Page Setup
2. Select Sheet tab
3. Click on Print Area icon
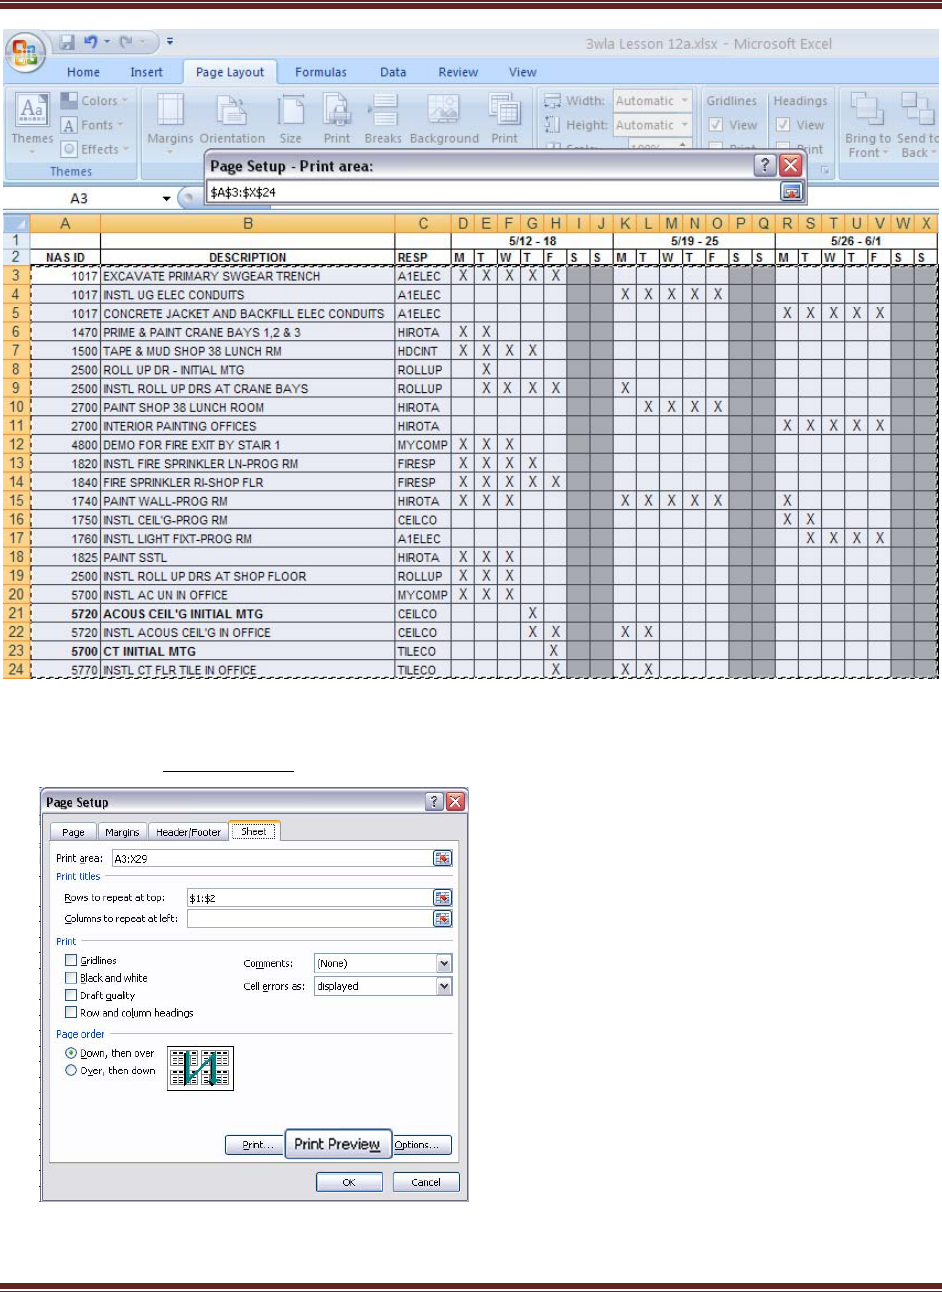
4. Highlight all activities, print area $A$3:$X$24
3‐WeekLookAheadSchedule‐Excel2007Version
Page13
5. Click on Print Preview button
3‐WeekLookAheadSchedule‐Excel2007Version
Page14
6. Print updated 3-Week Look Ahead Schedule
